As preppers and bushcrafters, we all know that guy. The one with every new gadget, clever tool and toy, but no real idea what he’s doing. Don’t be that guy. Having good equipment is important, but enough practice with the right skills will always make much more difference and eventually could even replace the equipment altogether.
If you can make your own tools, build a shelter, and find your own food then you won’t be in trouble if you lose knife, have to leave your tent or run out of ration packs. Skills are more important than gear, and here are the most important basic skills you need to know.
Finding Water
Maslow’s hierarchy of needs begins with water, the most basic of human necessities. Of course you should pack a bottle or bladder of water in your bag when you leave the house, but inevitably you could be away from a source of mains water for too long.
You should learn a few different methods of locating water in different terrain (how to read the land, rainwater collection, evaporation stills) and then how to filter and purify it (boiling, using iodine/bleach, solar distilling and different filtration systems).

Foraging
After water the most important thing on your list is food. Nuts and berries don’t run away, so these should be the first things you look for. The best way to learn foraging is a little at a time, buy a few books and look up what is in season around your area now. You don’t have to start with a whole foraged meal, just try small exercises like having at least one foraged ingredient in your diet every day. Over the course of the week make sure to include a spread of different types of foraged food: berries and fruits, wild nuts and wild grains/grass seeds. Across the US, the best plants to get you started are:
- Dandelions The bane of every gardener, found pretty much anywhere they are not wanted. Every part of a dandelion can be eaten. The leaves can be harvested all year round, but are least bitter when young and fresh in the spring. The flowers are sweet and crunchy. The roots can be used like any other root vegetable, or even dried and used a stand-in for coffee. The stems are also edible but can be stringy, so are best boiled and used as greens A common recipe is to chop up the whole lot then fry with a binder (like wild bird’s eggs) to make fritters.
- Cattails A Staple food for native Americans, Cattails are found growing around the edges of water (ponds, lake edges, etc.). This can cause pollution, so don’t eat cattails from areas near industry or farms. The very top and bottom of the stork are edible raw or cooked, but the fiber in the middle can cause stomach trouble. The pollen (bright yellow when the plant comes into flower) can be collected easily and in large quantity and is a great extra in other dishes, like adding it to a normal batter to make cattail pancakes.
- Wild Onions These growing many varieties, each adapted to a different environment. Onions are bulb plants, so the ‘onion shaped’ part grows under the ground, while the visible part is tall, thin, green shoot (the whole thing is edible though, you can even just eat the green part). Unfortunately, lots of other things look like that. The general rule is: if it looks like an onion and it smells like an onion it’s probably an onion. Some wild onions’ roots can be snapped off as a whole root system and replanted, growing again the next year for long term survival.
- Berries As a fruit, a good source of vitamins and minerals, berries are an important part of a foraged diet. There are thousands of different species of berry in America. You probably already know a few: blueberries, blackberries, loganberries etc. However, unless you are you are absolutely certain of the species being edible you should not eat it. Berries can be very dangerous even lethal. As a general rule: red, white and yellow berries are likely to be the most dangerous, darker colors are probably alright. Most berries are fine raw, but are also great in smoothies or stewed in a pot.
- Mushrooms/Fungi Admittedly these are not technically plants but ‘fungi’. Fungi grow pretty much everywhere, and the ‘fruit bodies’ (the mushroom bit) emerge in early Fall. The same goes for mushrooms as berries: if you aren’t sure, don’t eat it.
Hunting
Even if you’re the best forager in the world you will still need some protein in your diet! Game (big or small) can provide this, as well other useful products like leather for clothes and bones/horns/antlers for improvised tools.
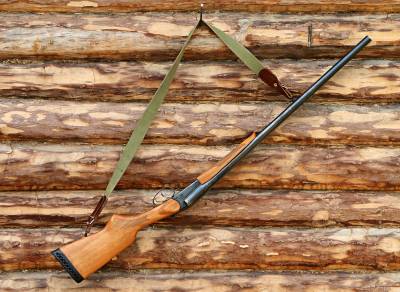
There are two standard hunting methods: bows and guns. The difference is long debated within the prepper community, but comes down to a tradeoff between power, speed and ease (gun’s come out on top) and cost-effectiveness, ease of maintenance/manufacture and retrievable ammunition (which bows are better for). There are two ‘happy mediums’: crossbows are more powerful than vertical bows, but have retrievable ammo and are easier to maintain and fix than guns. Slingshots are very simple to maintain, can be very accurate, and also have retrievable ammo.
You can also hunt with traps and snares. The advantage here is that you can leave a snare while you go to do something else, but only for a few hours, checking at least twice a day, which can tie you down to a specific place. Trapped animals can also be poached by other local predators before you get back to the trap. On the other hand, trapping requires less hard effort and you can take game from a wider area than with a single hunt.
In a survival situation, anything you can eat is great, but some all game was not created equal. Given the choice, in the US, the best game to hunt are:
- Rabbits, Jackrabbits and Hares These abound in most places and live in large groups. Rabbits are stupid, and so are relatively easy to hunt or snare. They have lots of lean meat, so you should eat them with some kind of fat to help process the protein. This could be the fatty offal organs (like liver and kidneys, brain, or cooking the rabbit in the skin after scorching off the hair. These small game should be shot just behind the eye, straight through the brain.
- Deer, Moose, Caribou and related species. These are big game, much too big to be snared or trapped effectively. Hunting animals like these is the only option and requires big ‘broadhead’ arrows or large bore shot. Some (deer, pronghorn) are herd animals, and the best strategy is too stalk the pack and eventually single out the slowest, then go in for the kill when the whole herd runs away when spooked by something. Moose are solitary creatures, so a long careful stalk of one animal is necessary.
- Birds As flying animals, birds are difficult to trap. Most birds can be eaten and always much better cooked. Smaller birds can be taken easily with a slingshot, bigger ones will require a gun or bow and arrows. The best known and hunted are turkey (which requires practice with a turkey call, initiating a hen) and ducks (which need good camouflage and utter patience).
Always, always, before you do anything, you should check your local laws, attain any relevant licenses and do at least some basic training with a professional. Hunting is meant to be dangerous, don’t be stupid or proud, it could get you killed.

Fishing
Fishing is another great way to find food. Fly fishing, line angling and overnight lines or nets are the most popular methods inland, with different merits and drawbacks. As with anything else, an appreciation of all the methods is good, but specialize in whatever works for you. If you live near the coast you may want to investigate sea fishing with nets and long lines, especially in high tidal waters. If using nets, don’t leave them more than a few hours at a time, or the fish will go rotten or (worse) be poached by other predators!
Like hunting it will be necessary to attain the correct licenses or permits first, and it is always advisable to begin by learning from an experienced fisherman.

Making and Using Fire
Humankind is defined by our use of fire. It keeps you warm, cooks your food and scares away scary beasts. You need to learn a variety of different ways to light fires: in a safe training exercise the best one to use is the most difficult the one you don’t like, so you get better at it, especially since this will probably be the hardest one, which will always work, wherever you are. In a true survival situation always do whatever the quickest, easiest way is, because your life really does depend on it. This will be probably be a tool like matches, a lighter or a firestriker. Three great ways to learn are:
- Friction Drill Using either your hands, or a piece of cord on a bow, spin a hardwood stick against a flattened ‘board’ (stick with a flattened side, use your foot to hold it steady) until it makes a divot in the surface. Cut a small noth from the side of the stick to the divot, then place a piece of completely dry wood, with your tinder on it, under the board and keep spinning, Eventually the tinder should ignite, at which point you push it into the middle of a bigger bundler of tinder, which you use to light a proper fire. The main advantage of this is that you will always be able to find the things you need and won’t suffer from loss of special equipment, but it is very tiring and takes the right knack.
- Striker Flint and steel, ferrocerium rods and magnesium fire strikers are simple to use: gather a bundle of small, dry tinder, push the end of the rod into it, and run the scraper down it as hard and fast as possible. You should get a shower of sparks which if=gnite the tinder, then you can build a bigger fire around it. Fire strikers work thousands of times and you will have lots of warning if you do ever need to replace them, but f you lose your striker and don’t have a spare, your done for.
- Matches/lighter This is the easiest way to light a fire, or rather to transfer the fire from a match/lighter to a pile of wood in front of you. If you have enough lighter fuel or matches, it is certainly the least likely of all the methods to fail, but it’s also good to conserve those important resources until later by using another method.
Having lit your fire, you should also be aware of different types and structures of fire. A large, warm fire for all-night heat is very different from a small, hot one for cooking or boiling water. Cooking on a fire is very different from using a gas ring. The best teacher here is experience, just try out lots of different ways of frying, roasting, smoking etc over a fire and see what works.
Shelter
Along with food and water, shelter completes the base of Maslow’s pyramid. As with other skills, different environments dictate different shelters (nobody builds igloos in the middle of the Sahara!). You should learn to use a mix of different types of shelter:
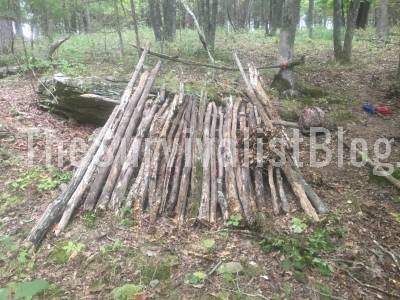
- Debris Hut These tend to be either lean to or A frame structures, built around very few poles. Erect your frame (just position the poles, stuck into the ground if possible, then lash together with cord), then lash a few cross spars between the poles of your frame. Cover that with long thin material like smaller branches and large leaves, Finally just heap on as much material as you can find, soil, leaves, twigs, branches etc., until no light can be seen from inside.
- Tent Often passed over when discussing shelters, tents are warmer, dryer, larger and easier to erect than ‘wilderness’ shelters. Spend a while researching what you need and buy the best you can, then practice and learn to put it up as quickly as possible. At some point you will almost certainly have to put it up in the dark and the rain and the cold. The downside if that tents are extra weight to carry, and include a tradeoff between utility and weight.
- Tarp A happy medium between tent and shelter, tarps are lighter than a tent but will require more thought to pitch and cover less ground. Basic ways to pitch are variations on a central raised pole (making a tipi shape with the tarp draped over it) or ridgeline (drape the tarp over it side to side, then weight or stake the edges to the ground to make an A frame shape). You can fold in the edges of the tarp to cover the ground inside a bit, or you can just take an extra tarp as a groundsheet.
After mastering the shelters above, build on them, adding things like a covered entry, heat reflecting walls or a fire pit inside with a draught flue. Along with learning structures come a few other useful skills: knowing the right knots for different joints, identifying wood and reading the land (for knowing where to put your shelter).

First Aid
Learning first aid will mitigate against unpredictable crises in your group. Even the most knowledgeable, aware, perfectly geared up prepper is useless if they’re knocked out by someone else’s mistake. But mistakes do happen and you need to know how to deal with them.
A simple first aid kit (real simple, just a couple of band aids and some pain killers) is a really good start, but after that, courses for more advanced skills like CPR and wound closure/suturing can be the difference between life and death. For more information the Red Cross is almost certainly the best bet. Knowing a few natural remedies is also great, Culpeper’s herbal is the standard work for beginners here.

Close Combat/Self Defense
It is likely that one day you will be in a fight. If you want to come out on top, you will need to train,as fighting doesn’t come naturally to most. If possible, learn to use (and carry, especially in high risk areas) some kind of weapon, a knife is versatile, can be thrown or used for contact and if you pick the right one can be relatively innocuous.
Far and away, the best knife for the job is a Fairbairn Sykes fighting knife, a double edged dagger developed by British police officers serving in Shanghai between the wars, then issued to the British Marines commandos and S Army Rangers for combat. The same men developed ‘Defendu’ a similarly brutal system of self-defense involving weapons as well as hand to hand work.
If a knife is impossible then a force multiplier like a kubotan or yawara stick is better than nothing, and can be improvised form any similar item, like a sharpie pen. Many of the same principles of stabbing and defending can still be applied with a weapon like this.
Whether you carry a weapon or not, hand to hand combat principles are still important. Krav Maga is widely accepted as being the most effective system, having been developed by Imi Lichtenfeld to fight Nazis in Jewish areas of Czechoslovakia, it’s fundamental principle is to ‘use natural movements and reactions’ and teaches dissipation and evasion tactics as well as just brute force (it is very good at brute force when it needs to be though). To supplement this with extra training, different approaches and more fitness, boxing will improve your punching (though relatively few incidents actually need this, they are mostly countering other’s attacks, not ‘straight’ fights) and MMA will give you a good chance to practice in a relatively controlled environment.

Navigation
You will need to move post-disaster, whether you travel in a group or alone. Knowing how to find north, read a map and leave/read a trail is vital. The most obvious skill to begin with is map reading. Make sure you own and understand maps of your local area, and ideally try to walk as much of it as possible, to really get to know the place you are most likely to be in disaster strikes. Knowing where north is will be vital for map reading, so learn a few different ways of finding it: how to read a compass (and how to improvise one should you lose yours), finding Polaris (the ‘North star’) and reading the sun.
You can expand your navigational knowledge by learning more complex astronomical navigation (learning to use a sextant, or how to read more stars, like knowing that Mintaka always rises within a degree of East) or advanced GPS equipment.

Communication
“No man is an island’ wrote John Donne, and he was right. Surviving alone after the SHTF is possible, but lonely and coordinating with your team is important. The basics are things like blazing trails (and equally important, learning to read blazes left by others), international distress signals and learning to use a HAM radio (an amateur radio license is not legally required in an emergency, but it is if you want to practice now, and is a great way to learn).
After that you might want to progress to semaphore for long distance communication without the need for technology, Morse code for radio telephony or encryption for hiding your messages from those you don’t trust. Accruing official qualifications in these areas (like radio licenses) can be very useful as it forces you to learn accepted procedures. Although the bits of paper won’t mean much after the SHTF, it is true that most people on the air will be professionals, similarly qualified, so will all be using the same protocols.
Another aspect of communications prepping is setting up dedicated communications systems which you know will work post disaster. This could be as simple as agreeing a place to meet or a way to pass messages with others in your crew, or as complex as setting up your own meshnet. Even just learning to whistle with your fingers to attract attention can be surprisingly useful.

Making and Repairing your own Stuff
Some preppers are very rich. For them that’s great, before the SHTF they are able to buy all the equipment they could possibly need, readymade. And after the SHTF? Once their gear needs repair or breaks completely? The ‘poor’ guy down the road who spent all his money on tools will be charging them stacks of food to repair it, because nobody will be willing to sell their all-important kit. Don’t be those guys.
The best way to learn to make or repair anything is to make it. As Wordsworth said ‘to begin, begin’. Do your research, buy the right tools and materials (which is always cheaper in the long run) and build as much of your kit as possible. Good skills to learn in this area are sewing (with a machine and by hand), darning, knitting, forging and knapping (for making your own tools and weapons) carving, rope/net making, building (more complex than just shelters, things like mud huts and log cabins) and pottery (for making your own cooking and storage vessels).
Attitude
The Prepper’s rule of three says that you can last for three minutes without air, three hours without adequate shelter, three days without water, and three weeks without food. The list above would seem to cover this, but people often miss the first and most crucial three: you can only last three seconds without hope. Fancy kit or even flintknapping and bow drills will get you nowhere fast without the right attitude, a prepper’s mindset of coolheadedness and psychological strength, to know how and when to apply the skills you learned above.
The only way to train one’s attitude is experience. Go hiking. Go off into the woods alone and test your kit, and yourself. If both are up to scratch, you will gain confidence, Iif not, at least you learned what you need to work on.
Learning once is not Enough
Learn these skills. But once you’ve learned once, don’t slack off and think you’re made. Prepping (and in general, learning anything) is a lifelong experience. After you have learned, you need to practice. Practicing skills in isolation s better than nothing, but if you can, try to combine them in more complex activities, like ultra-light backpacking or going to primitive gatherings with as little kit as you think you can live off and making everything else you need.
Nick O’Low first went camping at six, lit his first fire by seven, and
learnt to throw knives at eleven. He made his first knife from a kit he
was given for his thirteenth birthday, and by fourteen was making solo
overnight trips, and learning to read the stars. Despite an extensive
experience of the more practical aspects of bushcraft, his current
interest lie in the philosophical and theoretical aspects of navigation,
harmony with one’s environment and learning to truly live, wherever you
might find yourself.