
If you’ve ever had a small appliance break on you just when you need it most, you know how frustrating it can be. If you’re like most people, you aren’t really in the position to just run and out and replace an appliance on a moment’s notice, or pay big bucks to have a professional repair it. If it’s a convenience and not a necessity, you’re even less likely to want to blow your budget on it if you can avoid it.
As a single working mom of four, money was always short. I can’t even tell you how many times I had to do without until I could afford to get broken appliances replaced or fixed by a professional.
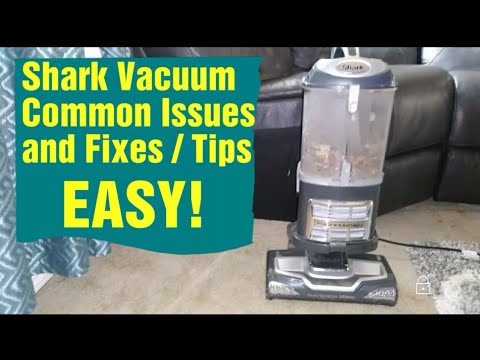
If my vacuum cleaner stopped working, that was it. I didn’t know how to take it apart and I was too afraid to even attempt it. I bet I replaced at least ten vacuum cleaners because they stopped working in my lifetime, maybe more. Of course, I now know that more than half of those I could have fixed myself.
As I’ve become more involved with prepping over the last ten years, and as YouTube has become the go to for step by step tutorials, it’s became clear that if small appliances could be repaired by a professional, then there must be way to take them apart and fix them.
Benefits of Repairing Your Own Small Appliances
The knowledge and ability to fix small appliances on your own can save you a ton of money and inconvenience. You can put that money you would have spent on paying a professional repairman into your preps!
There’s also a sense of pride and accomplishment that comes with repairing something yourself. It’s doable and you don’t have to be an expert, you just need some basic knowledge about how things work, a LOT of patience, the right tools, and maybe a few parts.
The Fundamentals of How Small Appliances Work
Before you work on ANY type of electrical appliance, always make sure to turn it off and unplug it from the wall. It’s a good idea to wear protective work gloves if possible to avoid cutting yourself on a sharp metal casing or appliance blades, etc.
If you’re just learning how to repair small appliances on your own, the first thing to understand is they fall into some broader categories. It’s also important to understand as much as you can about the basics of electrical circuits in appliances as described in the video below:

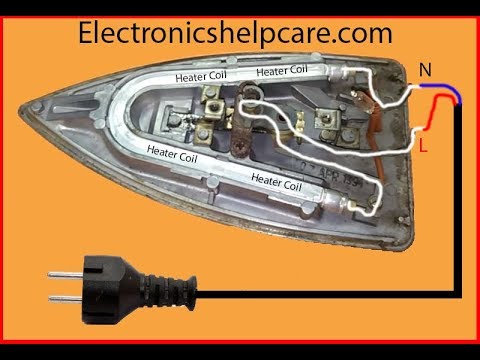
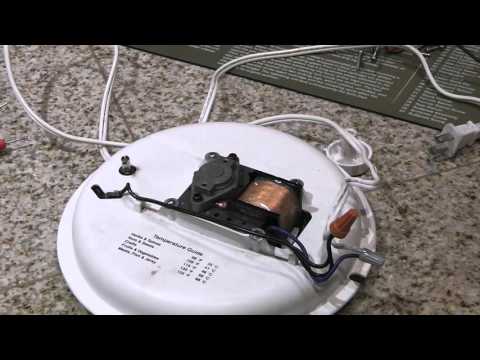
Appliances that Heat
Below are just a sample of small appliances that heat. I’ve included how to videos next to a few of them. If you need a how to video on any other type of appliance, simply look for a tutorial on YouTube. You’d be amazed at what you can learn by watching someone else do something successfully.
Always make sure you are following any safety procedures for the type of item you are working on. I recommend watching any tutorial video in its entirety so you know what you’re getting into.
Also, before doing any repairs yourself, make sure you review your warranty for the product. If your appliance is still under warranty, making any repairs yourself could make your warranty null and void.


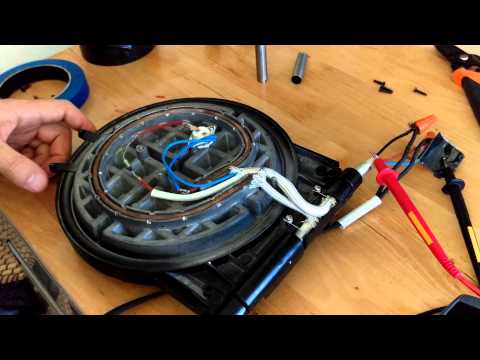

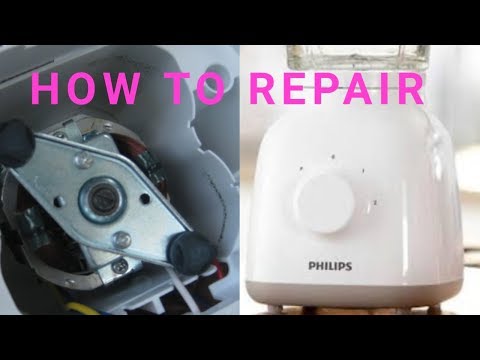
Appliances that Move
Most of the small appliances that move or are motorized were created to make manual tasks easier and more time efficient. We could accomplish these tasks manually or in the case of the washing machine, by packing up and heading to the laundromat with our clothes when our washer breaks.
But in today’s modern world, many people have too little time to do task by hand anymore. In addition, there’s a whole generation who has been raised with these modern conveniences in every home, they know no other way.
So, when one of these motorized appliances break down, you can either pay a professional repairman big bucks, do the tasks by hand, or learn to fix it yourself.

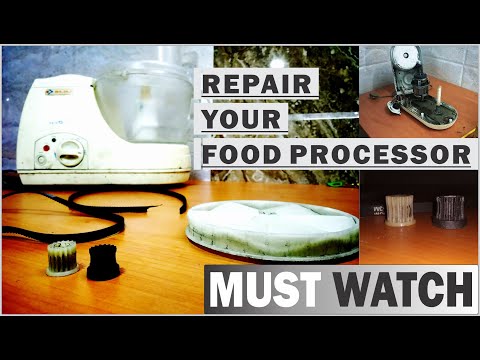
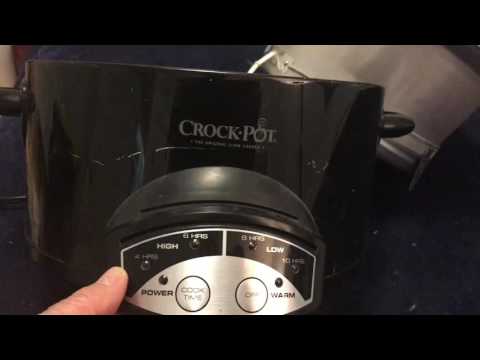
Other Appliances
There are of course some small appliances that don’t fit neatly into one category. Although these small appliances can be a bit more complex, it’s still possible to fix some problems with these machines yourself with enough knowledge. And it’s typically cheaper too.


As you can see from some of the how to videos above, many small appliance repairs can be done easily and quickly once you have the knowledge of what to look for.
Identify the Problem
One of the first things you need to do if you’re going to repair your own small appliances is to make sure that you correctly identify what the problem is. If the appliance isn’t working at all, start by trying to plug it into a different electrical outlet or by testing the electrical outlet.
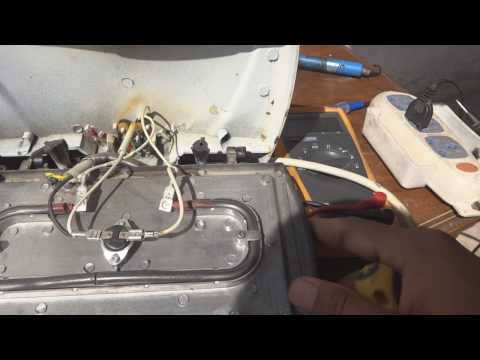
If you can verify that you have power to the appliance and it still isn’t working, you can check for continuity in the appliance using a multimeter:

Check the plug and wire connecting the plug to the machine. If the appliance seems to be getting power but isn’t operating correctly, you’ll have to do a bit of trial and error testing.
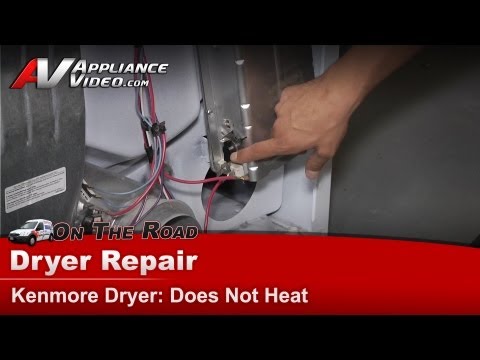
Unplug the machine and test for continuity in each area to identify the problem part or wire. Here’s an example of how to identify a problem with a dryer:

The Right Tools for The Job
One of the things you’ll discover when you begin to repair small appliances on your own is that having the right tools for the job will make everything a lot easier.
There’s nothing worse than trying to use a flat head screwdriver on a Phillips screw. There is a time for improvising but it’s better to start off with the right tools. Some additional tools you may want to have handy if you are going to learn to fix things on your own are listed below.
Quick disclosure: If you visit a link in this article and then you buy something, I may earn a commission. As an Amazon Associate I earn from qualifying purchases. You can read my full disclosure here.
- Set of wrenches in different sizes (Metric and English)
- Putty knife
- An open end wrench that is adjustable
- Nut driver set (English and metric)
- Standard Pliers
- Channellock Pliers
- Wire Cutters and/or Wire Strippers
- Multimeter
- Wire Connectors
- Power Drill/Driver (nice to have)

How to Find Replacement Parts to Repair Small Appliances On Your Own
Once you’ve diagnosed the problem, you may need to replace broken components, such as plugs, switches, fuses, or control boxes. There are a variety of ways to get replacement parts depending on the type of appliance, the part needed, your local area, and your budget.
- You can check the owner’s manual to get the name and number of the part.
- If you don’t have the owner’s manual, you can remove the non-working part and take it with you to match to replacement part.
- Once you have the part number or the broken part in hand, visit the retailer where you purchased the item to see if they stock replacement parts.
- Depending on the type of component you need, you may be able to find the same component in discarded appliance at the junkyard or a even a from a flea market vendor.
- You can contact your manufacturer, describe the part or give them the part number and request a replacement part be shipped to you.
When to Call in a Professional Repairman
Even though it’s possible to fix many simple problems yourself, you may need to consider calling a professional repairman instead.
Each specific situation is different and you will have to decide for yourself when you need professional help. But one of the first indications that you may need to call a professional repairman is if you can’t diagnose the specific problem with your appliance.
Although you may be able to eventually fix the appliance through trial and error and replacing one component at a time, you could end up spending a lot more money and time than if you called a professional.
Are you ready to try to fix a small appliance on your own or have you done it before? Let us know in the comments below.

A mother of four and grandmother of nine boys and one girl, Megan is living the lifestyle any prepper would want. Gardening, homesteading and constantly planning for emergencies big and small, she’s a beacon of knowledge in the prepping community.
Well, maybe. but most newer appliances are ,shall we say, inexpensively built. They are not designed to be repaired. I have my grandfather’s 20 inch box fan. It is over fifty years old. The wires are thick and many inches long between the power cord attachment, the switch, and the motor. It devolved a broken wire but I could easily splice it. I have a much new fan, the distance from the cord attachment, switch, and motor is as short as possible and the wire is them minimum allowed. I had to stretch the wiring to splice a short.
Larger appliances are built the same way and are loaded with sensors and have warranty clauses. My new gas stove was shipped ready for natural gas, the LP gas orifices were included but the warranty stipulated only a certified technician could do the switch and there is a certificate to be signed. I did it myself, who needs a warranty.
I ran a farm for 25 years then I spent 10 years working on $250,000 automated packing machines and and industrial cooling systems. My supervisor there was trained by the DoD to work on ballistic missiles. If you have not had such experience be very careful working around gas and electricity.
Megan,
The Right Tools for The Job
I’ll comment more later; but, at first glance:
You have a good list; but, you might want to add Torx & Hex wrenches in different sizes & a pop rivet tool with rivets in various lengths & diameters.
I agree with Daddio. Todays appliances were made to be ‘thrown away’. We had a neighbor who worked in appliance repair, and even he as much said so. If you are dealing with a warranty, go ahead and call the repair man. We do try to repair as much as we can, and maintain as best we can. Some of the smaller, cheaper things like the coffeemaker, we just replace, as they are relatively inexpensive. Our larger appliances, when they need replaced, we either buy second hand or pick up off the curb. DH is pretty handy, and his dad was an electrician, so he’s pretty good with that kind of stuff. I prefer not to mess with electricity, but I can rewire a lamp and small things like that.
Grammyprepper,
Our local large appliance repair guy is third generation and went to school with one of the boys. He has actually fixed a few mechanical things using salvaged parts from old clothes washers, and has told us that repairing our older washer with his salvaged parts, will probably give us better service life than some of the brand new models. So far, he has been on the mark.
Electricity doesn’t bother me at all, since the worst that can happen are some sparks and a blown fuse or popped breaker. The thing I am the most careful with is gas, natural or propane, since a tiny leak can build up enough to cause an explosion or fire, so very carefully putting the fitting together and triple checking for leaks is very important.
Over the years I have installed a gas range, a gas water heater and two ventless propane heaters with no problem; but, a lot of care and double checking before use.
Megan,
My attitude has always been, if it’s broken, I can’t really hurt it. BTW, taking it apart is the easy step, putting it back together is the hard one; but, as long as you take the safety precautions you described, like disconnecting the power source, it’s hard to do anything except learn.
I agree, and short of something like brain surgery, we can all do most anything if we’re willing to try. YouTube is the go to place for much of this, and it’s hard to find any topic that someone has not covered. It’s kind of a version of ”The infinite monkey theorem.” for video.
The Right Tools for The Job
As I already stated, you have a good list; but, you might want to add Torx & Hex wrenches in different sizes & a pop rivet tool with rivets in various lengths & diameters. Also, for those who don’t have a DMM, keep an eye on Harbor Freight ads, since they occasionally offer a free one with any purchase and the coupon. While these don’t have the accuracy of my bench meters, they are well beyond the accuracy needed for these little jobs.
When to Call in a Professional Repairman
Or Repairwoman?
I’ve been doing this for more than 50 years, starting out helping my dad who could seemingly do anything. By age 14 I was working (actually more hanging out) at a local appliance repair store, often getting to work on tube based amplifiers & radios for fun. Sometimes when a radio or TV was not repairable or the owner didn’t want to spend the money to do the repair, I would be given the old hulk to play with. I would often repair them or simply remove all of the components that I later used to build other things. By 11 or 12 years old I had taken an electronics correspondence course from the National Radio Institute with tutelage from my dad. My father had taken the course under his WW II GI benefits and the booklets and test were still around. By about age 10 I was helping my uncle wire houses. My first house out of college @ age 25 was in serious need of repair, and I rewired it from the new meter base in. If you have two hands, two eyes, and a working brain, you can accomplish anything you put your mind to.
At age 13 I won a 7th grade science fair and the book I won as a prize was ”How Things Work”. I have collected additional similar books over the years, since if you know basically how a piece of equipment works, it’s much easier to determine what isn’t working.
My DW was a lot like you until we had our clothes dryer stop heating. I had her watch a YouTube video and we then took the back off of the dryer, located and disconnected the heating element, and using one of my DMM’s measured the resistance of the element. It measured infinite, meaning it was broken, so I ordered another online, and in a few days when it arrived, we installed it and life was great again. We did BTW, leave the dryer unplugged and the back off to facilitate installing the new part when it arrived. The hardest part was keeping the cat out of our work space.
Over the years I’ve fixed refrigerators, rebuilt the impellor on a jet pump, and tinkered with about any gadget you can conceive.
Here in our rural neighborhood, nearly all of my farmer neighbors can do basic mechanical work, as well as welding, grinding, etc. just to afford to keep machinery running to make a living and feed us all.
So if you have a modicum of tools and access to YouTube, remember my first statement above, ”If it’s already broken, you can’t possibly hurt it.”, so strap on that tool belt and go for it.
A lot of modern appliances are built using security screws. These keep the uneducated out, and encourage upcycling. You can buy sets of security screw bits at electronics parts stores such as SAYAL or in places like PRINCESS AUTO, which also sells online. Like TORX bits these showed up 30 years ago. My first TORX screwdriver cost $30. TORX is very common in cars.
For years we had a cottage that was an hour’s drive from “anywhere”. My approach was to buy the cheapest appliance and replace it if anything went wrong. Our dishwasher cost $225 at IKEA. Winters are harshe up there, -40C for days on end. And the cottage is unheated, so the plumbing has to be drained and winterized. One mistake or something overlooked & you have a problem when you turn the water on in the spring.
Stove & fridge were similarly low end models.
The previous owner had installed a $1500 washer-dryer combo like you see in condo bathrooms or kitchens. It had minimal capacity. When the washer motor smoked due to overloading, i bought a full size top loader washer for less than $400 and installed it in our storeroom. The condo style dryer still worked, and the unit must weight several hundred pounds, it takes 3 strong guys to move it out of its cupboard & then you are trapped in the bathroom while you repair it. I think the combo was installed first, then the bathroom built around it.
Even to trash something up there involves a 15km trip one-way to the dump, a dumping fee, and you need a trailer or a pickup truck and a couple of strong people to move it & load it. That’s not cheap. I just paid $130 here in the apartment to have a junk company come & remove a king mattress.
Our first winter I neglected to drain the coffeemaker. In the spring the reservoir leaked so we had to spend $80 to replace it.
To avoid a fire it’s best to turn off all the electricity for the winter. Your tv has a minimum storage temperature so you need to take it home for the winter.
Rod,
Yep and those security screws are often accompanied by a sticker stating something like: ”No user serviceable parts. Refer to qualified technician” to scare off the timid.
I’m finding Torx or hex keys in more and more places, and actually like them, since once the bit is inserted, it’s less likely to slip out like a Phillips or especially a flat blade.
I think I would be disassembling that mattress or other junk and disposing it a bit at a time in the normal trash, or recycling the metal if it’s worth anything.
Also, your 15 km (about 9.4 miles) is a short trip where I live; but, we like it that way, since it’s farther for the zombies to make it clear out here also, LOL.
In many places now the normal trash is charged at over $5 per bag. And it’s difficult to cut up a king size mattress in a one bedroom apartment altho I agree with your intent.
Also I am 71 and have a bad back & leg so wrestling a mattress down a long hallway, into an elevator, and then thru several doors and car loss a parking lot to a dumpster without being seen is a difficult feat. In cities in Ontario it is getting more & more difficult and expensive to get rid of trash.
One of the joys of cottage life was our more intimate relationship with our garbage LOL
We really learned to think about the social costs of our plastic and other trash.
Rod,
I’ve done that within the confines of a bedroom. You need a good knife or two, a large pair of diagonal cutters, a bolt cutter, some trash bags, and some patience.
I’m 68 and the DW turned 69 earlier this week; but, there would be no hauling a mattress, since as I stated above, we would haul out the pieces a bit at a time.
The last I lived in a city was about 38-39 years ago and it wasn’t near as large as Ontario with its 14,000,000 people. That city had a population of about 5000 at the time. My current entire county only has about 55,000 residents; but, perhaps it’s the culture or the terrain, since Ontario covers an area of 415,600 miles2 or 34 people per mile2 while my county covers only 437 miles2 or 125 per mile2 making our population density 3.5 times larger than yours. Maybe a lot more agriculture here.
I understand, and we have essentially lived that cottage life full time for the past 35 years. Some trash goes into a dumpster, some is burnt, and some composted.
good point about the security screws, I didn’t know that! Thanks for your insight.
there is no such thing as trash, only stuff that is in the wrong place! dont remember who i read that from, but it is true. even the goober mint takes toxic waste and fills old mine shafts with it!
ive even used the thin metal wires in antique matteresses to hold up the wicks (from broken or bent tapers) on pringles cans while i pour melted candle stubbs (gotten for free from a thrift store dumpster) to make all my survival candles the same size. use heat from wood stove in winter to melt the old wax. i buy a 35 cubic yard dumpster load of wood scraps that came from a truss factory, for just $185 delivered 65 miles from trash mans location. sift the sawdust out with a scoop shovel and some chicken wire. small box of sawdust will burn in my stove along with a good hot fire. boxes are gleaed from dumpsters.
Leonard,
That sounded familiar and came from an old rhyme on the subject:
• When I was a little boy, I liked to catch the rain
• While people all around my town watched it flow right down the drain.
• But because our little shed in the bush wasn’t on the mains.
• The only water we had to use was in a tank caught from the rain
• Caus there’s no such thing as waste Only stuff in the wrong place
• There’s no such thing as waste Misusing water’s a disgrace
• I moved to the city, rented a house, on my way to buy a bed
• Saw one lying on the side of the road so I took that one instead.
• I also found a fridge, a couch and a big old plasma screen, in the biggest pile of thrown out stuff that I had ever seen
• But there’s no such thing as waste
• Only stuff in the wrong place
• Yeah, there’s no such thing as waste
• That old landfill is a disgrace.
• Down the track, I found out that diesel cars can run on veggie fat
• Bought a truck and hit the road, smelling like fish & chips
• I rescued piles of wasted oil from the back of restaurants
I wouldn’t call that smart, since it can probably be recycled into something useful.
I’m still sitting on several hundred pounds of paraffin; but, this is a great idea.
I wish I had a resource like that; but, there is a place close to me that tears apart old pallets and grinds into mulch. Maybe I need to talk to them about their scraps.
Good ideas all.